
A cannon uses one TNT group as the charge and another as the shot. The charge launches the shot; the shot breaks blocks when it detonates near the target.
Short version
The charge is the TNT that pushes. It should be contained by the cannon design rather than becoming the wall breaker.
The shot is the TNT that reaches the target and applies ExplodeAny durability damage.
Too early and the shot explodes short; too late and it overshoots or scatters. Consistency matters more than size.
Use practical cannons and clean up. Giant abandoned spam builds are not the goal of the server.
How it works in-game
- Build and test the cannon away from a real target until it fires the same way repeatedly.
- Use the shot to apply block durability damage; do not rely on water as target immunity.
- Bring repair parts and a kill switch before you bring extra TNT.
Build references
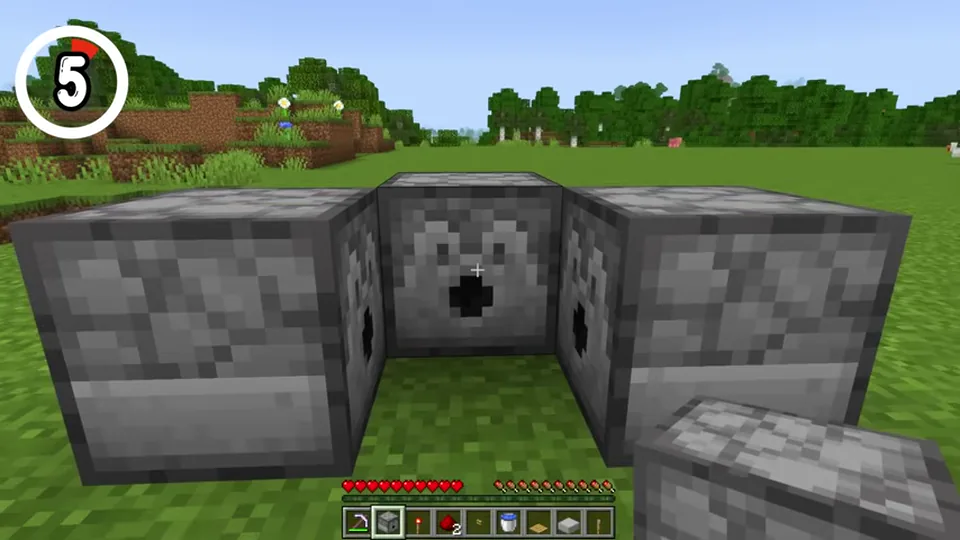 Watch it being built
Starter four-dispenser cannon
A compact first cannon: three charge dispensers push one forward-facing shot dispenser. Use it to learn charge, shot and water tray behavior before building larger raid hardware.
Materials
-
 Dispenser
x4
Dispenser
x4
-
 Redstone dust
x2
Redstone dust
x2
-
 Wooden button
x1
Wooden button
x1
-
 Redstone torch or lever
x1
Redstone torch or lever
x1
-
 Water bucket
x1
Water bucket
x1
-
 Pressure plate or slab
x1
Pressure plate or slab
x1
-
 Solid building blocks
x12+
Solid building blocks
x12+
-
 TNT for testing
x16+
TNT for testing
x16+
Build order
- Place three dispensers as the rear charge bank and one dispenser facing forward as the shot.
- Put the plate or slab at the mouth and place water so the charge can fire without destroying the cannon body.
- Run redstone over the charge dispensers, add the wooden button, and use a torch for automatic charge or a lever for manual control.
- Load every dispenser with TNT, fire once, then watch where the shot lands before changing anything.
Best for learning and close testing. Do not assume this simple layout is enough for a serious obsidian wall on United Factions.
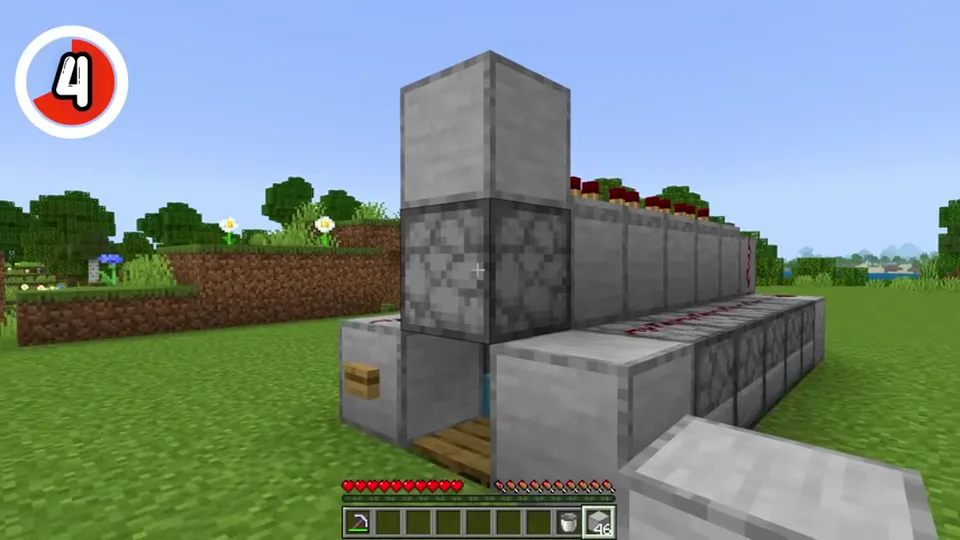 Watch it being built
Long-range sniper cannon
A longer water-channel cannon with two five-dispenser charge banks and a delayed downward shot dispenser. The repeaters control how far the TNT travels before detonation.
Materials
-
Side charge dispensers
x10
-
Downward shot dispenser
x1
-
 Redstone repeater
x5
Redstone repeater
x5
-
Redstone dust
x16+
-
Wooden button
x1
-
 Fence
x1
Fence
x1
-
Pressure plate
x1
-
Water bucket
x1
-
Channel blocks
x32+
-
 Optional end slab
x1
Optional end slab
x1
-
TNT for tuning
x64+
Build order
- Build two rows of five dispensers with a one-block channel gap between them.
- Close the rear, add water so it flows down the channel to the fence/pressure-plate shot point.
- Wire the charge dispensers from the button, then place the five repeaters on the delayed shot line.
- Place the downward-facing dispenser above the shot point, load TNT, and tune repeater delay before adding extra height or power.
This is the first design worth calling a raid practice cannon, but repeaters and distance must be tested on the actual server tick behavior.
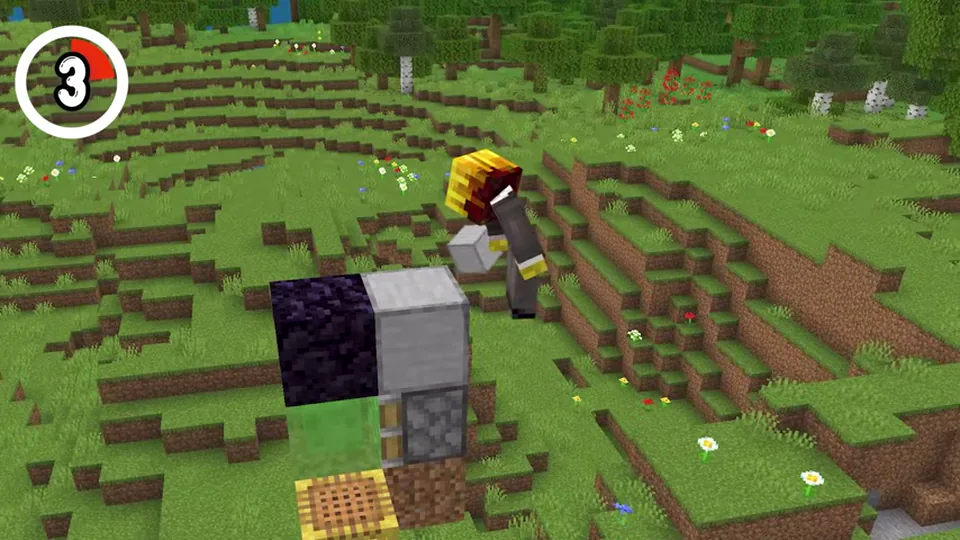 Watch it being built
Slime-block TNT launcher
A piston-and-slime launcher that physically punches primed TNT forward. It is easy to expand with more dispensers, but it is also easier to misfire if temporary blocks or timing are wrong.
Materials
-
 Sticky piston
x1
Sticky piston
x1
-
 Slime block
x1
Slime block
x1
-
 Obsidian stop block
x1
Obsidian stop block
x1
-
Downward TNT dispenser
x1
-
Redstone repeater
x1
-
Redstone dust
x2
-
Wooden button
x1
-
Solid blocks
x3
-
TNT for tests
x16+
Build order
- Start well above the ground while testing so a failed launch does not eat its own platform.
- Place the sticky piston facing the shot direction, attach the slime block, then put obsidian above the slime as the hard stop/reference block.
- Wire a repeater into the piston block, add redstone on the obsidian and rear block, then put the button on the obsidian side/front.
- Hang the dispenser downward near the slime path, load TNT, remove temporary blocks, and test one click at a time.
Expandable does not mean spammable. More launchers increase lag risk, misfire risk and staff attention.
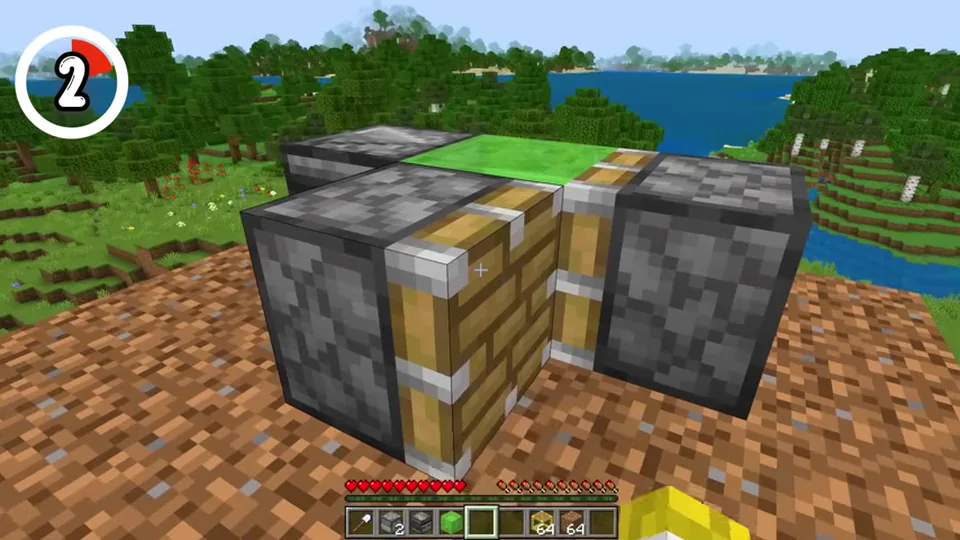 Watch it being built
Flying TNT dropper
A flying machine carries TNT dispensers over an area and drops explosives downward. It is useful to understand, but it is risky and easy to abuse.
Materials
-
Front dispenser
x1
-
Downward TNT dispenser
x1+
-
Slime block
x2
-
Sticky piston
x1
-
 Regular piston
x1
Regular piston
x1
-
 Observer
x1
Observer
x1
-
Obsidian stop block
x1+
-
Temporary build blocks
x16+
-
TNT payload
x32+
Build order
- Build high enough that dropped TNT will not immediately destroy the machine during testing.
- Place the forward dispenser/slime body, then arrange sticky piston, regular piston and observer so the machine advances in one direction.
- Attach downward-facing TNT dispensers under the slime blocks, load TNT and remove every temporary block that could stick to the machine.
- Trigger the observer, stop it with obsidian, and reverse direction only after swapping the sticky/regular piston sides correctly.
Treat this as a mechanics lesson, not a default raid tool. Uncontrolled flying TNT machines can become grief/lag problems fast.
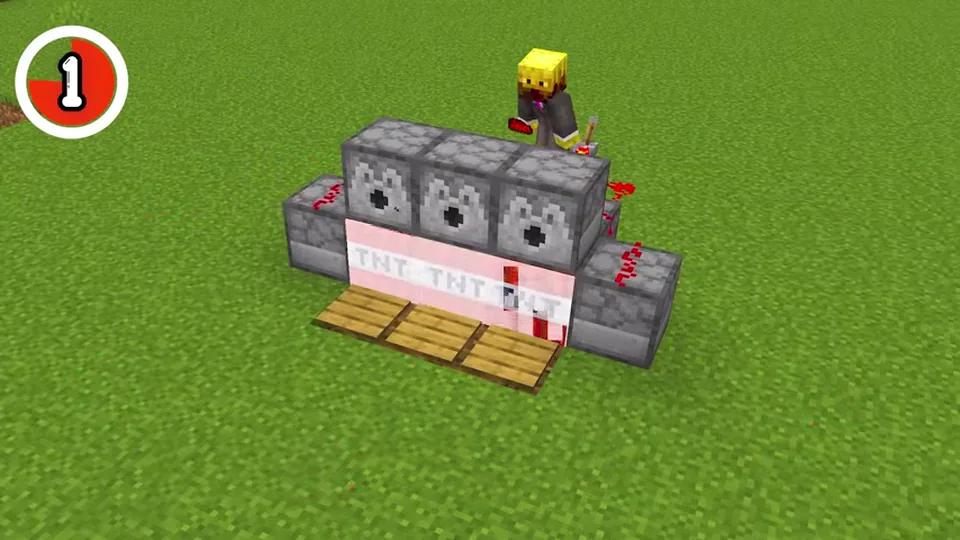 Watch it being built
TNT wave clock cannon
A six-dispenser wave design powered by a comparator clock. It outputs a lot of TNT quickly, so the kill switch matters as much as the build.
Materials
-
Dispensers
x6
-
Fences
x3
-
Pressure plates
x3
-
Water buckets
x2
-
 Comparator
x1
Comparator
x1
-
 Lever
x1
Lever
x1
-
Clock block + spares
x8+
-
Redstone dust
x7+
-
TNT supply
x128+
Build order
- Place three dispensers, leave the middle gap, then place three more dispensers facing the same direction.
- Put one solid block behind the middle dispenser and build a comparator clock in subtraction mode with a lever on the front.
- Wire the side dispensers, remove the three front blocks, then place three fences with pressure plates and two water sources across the front.
- Load TNT, start the lever, wait briefly, then connect the middle dispenser with redstone. Turn the lever off immediately when the volley has done its job.
This design consumes TNT fast and can cross the line into spam. On United Factions, controlled shots are better than crater flexing.
What to do
- Build in a test area first. A cannon that is one tick off destroys itself or drops the shot short.
- Keep the charge contained and water-cooled where the design requires it. In vanilla cannon logic, water prevents the charge from destroying the cannon while still pushing entities.
- Delay the shot so the charge fires first. If the shot primes too early, it explodes before reaching the wall; too late, and it may overshoot or scatter.
- Aim for consistency before power. A small repeatable cannon teaches more than a huge one that only works once.
About the video reference
The five build references above were analysed from BlazedMC's Bedrock TNT cannon video. They are rewritten here as original United Factions learning diagrams and must be tested on our live server before being trusted in a real raid.
The four parts
Every practical cannon has a charge, a shot, timing, and a barrel/path. The charge provides motion, the shot provides wall damage, timing decides whether they cooperate, and the barrel/path decides whether the shot is repeatable.
United Factions warning
Do not assume water-covered walls are safe here. The server has custom explosion durability, and underwater TNT block damage is enabled. Defense still helps, but water alone is not a magic shield.
Etiquette and performance
Use practical raid cannons, not lag machines. Huge TNT spam, cobble monsters and abandoned raid platforms may be removed when staff asks. Clean up temporary work after the fight.
Check this first
- Charge fires before shot.
- Shot lands at the same height repeatedly.
- You know how to stop the clock quickly.
Where this comes from
This guide uses public Minecraft/Lands mechanics and rounded United Factions player guidance. Exact backend formulas are not published and may change during balance updates.